
Most people assume wine tasting is an instinct you either have or you don’t. You swirl, you sniff, you say something vague about berries, and hope nobody asks a follow-up question. This wine tasting guide dismantles that myth. With a structured approach, the right tools, and a little patience, anyone can develop a reliable palate. Whether you are opening your first bottle or your fiftieth, the techniques here will sharpen what you notice, sharpen what you remember, and make every glass more rewarding.
Key takeaways
| Point | Details |
|---|---|
| Start with the right glass | A tulip-shaped stemmed glass concentrates aromas and allows you to hold wine without warming it. |
| Follow a fixed tasting order | Always progress from look to swirl to smell to taste to evaluate for repeatable, reliable results. |
| Use salivation to judge acidity | Immediate salivation under the tongue signals high acidity; delayed or minimal response indicates lower acidity. |
| Practise blind tasting weekly | Removing the label removes bias and forces your palate to do the actual work. |
| Keep a tasting journal | Consistent written notes build vocabulary, track progress, and improve buying decisions over time. |
Essential preparation for wine tasting
Before a single drop touches your palate, the conditions you create will either support or undermine everything you observe. Getting this right takes less than ten minutes and makes a genuine difference.

Choosing the right glass
Your glass shape matters more than most people realise. A tulip-shaped or ISO-standard stemmed glass tapers at the rim to concentrate aromas towards your nose. Wide-bowled glasses dissipate volatiles too quickly and make accurate smell assessment guesswork. Always hold the glass by the stem, not the bowl. Good glass-holding practice prevents your body heat from raising the wine’s temperature, which distorts both aroma and structure.
Setting up your environment
Avoid wearing perfume or cologne before a tasting. Even a subtle fragrance competes directly with the aromatic compounds in the wine and will skew your nose assessment. Choose a well-lit, neutral space. Natural daylight or clean white artificial light gives you the clearest view of colour and clarity.
Preparing your pours
A standard tasting pour of 50 to 60 ml per wine is the professional standard. This volume is enough to assess properly without over-consumption across a tasting flight. Line wines up from lightest to heaviest: sparkling first, then whites, rosé, light reds, and full-bodied reds last. Keep a glass of still water and plain crackers or bread nearby to cleanse your palate between pours.
Pro Tip: If you are organising a small group session at home, using numbered paper bags over the bottles turns any tasting into a productive blind exercise from the first pour. More on setting this up well in these home tasting tips.
Here is a practical overview of the tools to gather before you begin:
| Item | Purpose |
|---|---|
| Tulip-shaped stemmed glass | Concentrates aromas, maintains wine temperature |
| Still water | Cleanses palate between wines |
| Plain crackers or bread | Neutralises residual flavours |
| Notebook and pen | Records observations for comparison |
| Spit bucket | Allows multiple pours without impairment |
| White background card | Helps assess colour and clarity clearly |
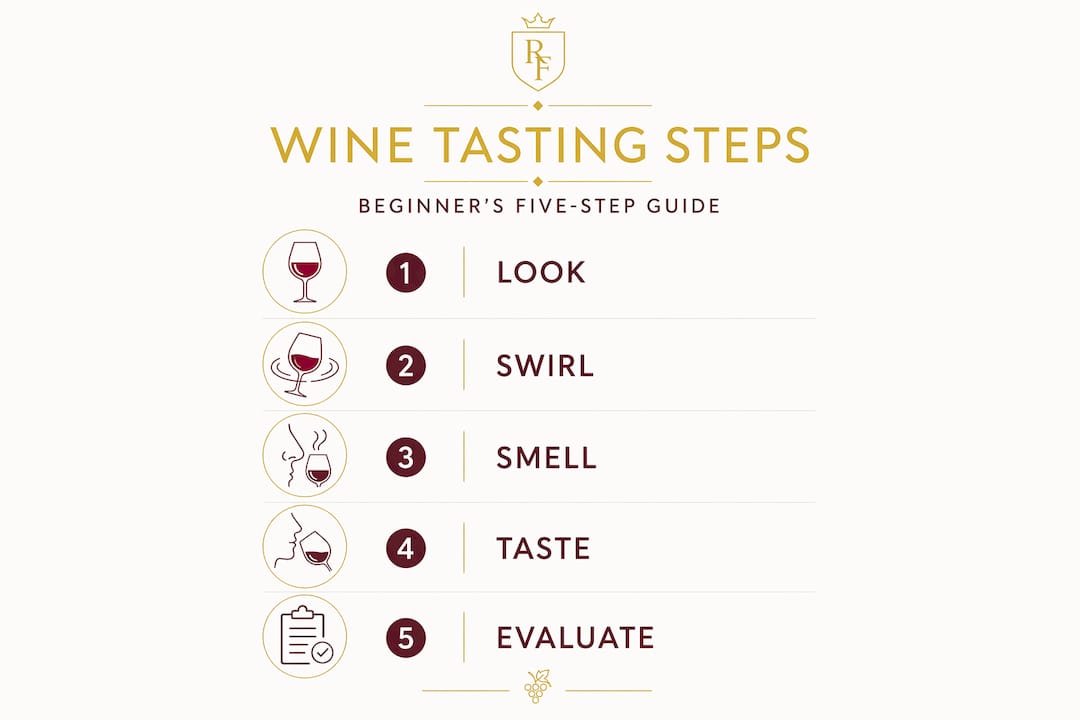
The five-step tasting technique
This is where the actual skill lives. The WSET Systematic Approach to Tasting uses a fixed sequence of appearance, nose, palate, and conclusions to produce objective, repeatable assessments. The version below translates that framework into practical steps you can use at home tonight.
-
Look. Tilt the glass against a white background. Note the colour depth (pale, medium, deep), the hue (for a red: purple suggests youth; brick or garnet indicates age), and the clarity (clear or hazy). Observe the rim variation. A red wine with a paler rim is likely older or lighter in body.
-
Swirl. Give the glass three or four rotations. This introduces oxygen and volatilises aromatic compounds. Watch the “legs” or “tears” that run down the inside of the glass. Slow, thick legs suggest higher alcohol or residual sugar. This is a structural indicator, not a quality one.
-
Smell. Take one short sniff, then a longer, deeper one. On the first pass, identify the category of aromas: fresh fruit, dried fruit, floral, herbal, or oak-driven. On the second, look for specifics. Primary aromas come from the grape itself (think blackcurrant in Cabernet Sauvignon, citrus in Albariño). Secondary aromas derive from fermentation (yeasty, buttery, bready notes). Tertiary aromas develop through ageing (leather, tobacco, dried mushroom, vanilla from oak).
-
Taste. Take a small sip and let it sit across your whole palate before swallowing or spitting. Assess five structural elements in sequence: sweetness (is there any perceivable residual sugar?), acidity (we cover this in depth below), tannin (the grippy, drying sensation on gums and cheeks, relevant in red wines), body (does it feel light like skimmed milk or heavy like cream?), and flavour intensity. Note whether flavours match your nose assessment.
-
Evaluate. After spitting or swallowing, note the finish length. A wine that lingers for ten seconds or more is considered long and is generally a positive quality indicator. Ask yourself whether the wine is balanced. No single element should dominate. Write two or three sentences in your tasting notes before moving on.
Pro Tip: When assessing flavours on the palate, think in categories first (red fruit, black fruit, tropical, earthy) before narrowing to specifics. This stops you getting stuck and trains your brain to pattern-match more quickly over time.
Assessing wine acidity
Acidity is one of the most important structural elements in wine, yet it is also one of the most commonly misread. Many tasters confuse the bright, citrusy flavour of a wine with high acidity. These are not the same thing. A wine can smell and taste of lemon and lime while actually carrying only medium structural acidity. Conversely, a very dry, low-fruit wine can carry very high acidity.
The most reliable method comes from salivation timing. After swallowing or spitting a sip, focus on the response under your tongue and along your lower gums. High acidity produces almost immediate, abundant salivation. Medium acidity gives a delayed response over several seconds. Low acidity produces minimal or slow salivation.
A key trap to avoid: temperature and residual sugar can mislead your perception. A cold, slightly sweet wine can feel highly acidic because the temperature makes it feel sharp. Always focus on mouth response, not flavour impression, for accuracy.
Here is a simple wine acidity levels reference to anchor your calibration:
| Acidity level | Salivation response | Example grape varieties |
|---|---|---|
| High | Immediate, copious | Riesling, Albariño, Grüner Veltliner |
| Medium | Delayed (5 to 10 seconds) | Chardonnay, Grenache, Merlot |
| Low | Slow or minimal | Viognier, some Marsanne, Carménère |
Pro Tip: To train your palate for acidity calibration, compare a squeeze of fresh lemon juice in water with plain water side by side. The salivation difference is dramatic and gives your tongue a physical reference point to return to during wine assessment.
A useful practice exercise: taste three wines back to back with no food, focusing only on acidity. A Muscadet, a white Burgundy, and a rich Roussanne will give you a clear high-to-low spectrum to work with.
Improving your palate through blind tasting
The fastest route to a reliable palate is removing the label. Blind tasting weekly strips away the expectation and brand bias that shape how most people experience wine. Without knowing whether the bottle cost £10 or £50, you are forced to trust only what you perceive.
Setting this up at home is straightforward. Ask a friend to wrap bottles in foil or paper bags and pour for you. Work through your tasting notes before revealing the wine. The comparison between what you assessed and what the wine actually was teaches more in one session than months of casual drinking.
Your tasting journal is the engine of improvement. Each entry should follow a consistent structure:
- Appearance: colour depth, hue, clarity
- Nose: aroma categories, specific descriptors, intensity, complexity
- Palate: sweetness, acidity, tannin, body, flavour character, finish length
- Structure: balance assessment, faults or positives
- Conclusion: quality level, readiness to drink, food pairing thought
Over time, this note archive becomes your personal training dataset. Patterns emerge. You start to recognise structural signatures for climates, varieties, and winemaking styles. Vocabulary deepens naturally because you are retrieving specific words regularly rather than reaching for them occasionally. If you want a formal structure, WSET qualifications progress from beginner to diploma level and teach exactly this kind of systematic evaluation.
Tasting etiquette and common mistakes
A formal tasting has its own set of expectations, and knowing them stops you feeling out of place. The most counterintuitive one for newcomers: spitting is not rude. Spitting is expected and professional at any serious tasting, as it allows you to assess many wines without losing clarity or sobriety. Spit buckets are provided for exactly this reason. Use them without hesitation.
Here are the most common mistakes to avoid:
- Wearing scent of any kind to a tasting event
- Rushing through pours without completing your assessment
- Holding the bowl of the glass instead of the stem
- Overfilling your glass when pouring for yourself
- Asking the host leading questions before you have formed your own impression
“The best tasters ask questions after they have tasted, never before. Lead with your palate, not the label.”
Note-sharing is genuinely valuable. Hearing how another taster describes the same wine expands your vocabulary faster than any textbook. Just form your own view first.
My take on what tasting really teaches you
I have sat through enough formal tastings to know that technique gets you only halfway. The rest is curiosity. When I started taking notes seriously, I noticed that the wines I understood best were the ones I had tasted multiple times across different contexts, different meals, different years. Technique gave me the words. Repetition gave me the understanding.
What blind tasting taught me more than anything: I had a lot of bias I didn’t know about. I consistently overscored wines I liked the look of and underscored wines with unfamiliar labels. Working through that honestly, note by note, is where real development happens. There is no shortcut.
I also think the science-versus-pleasure tension in wine tasting is mostly invented. Systematic tasting does not kill enjoyment. It deepens it. When you can read a wine’s structure, its origins and its age become legible. A glass of old-vine Grenache from the Côtes du Roussillon stops being just pleasant and becomes genuinely interesting. That is the reward for the work.
Tasting well also makes you a better host, a more confident buyer, and far more useful at the dinner table. Those are not small things.
— Moritz
Put your new skills to use with Resfortes
Now that you have a tasting framework, the best next step is to practise on wines worth paying attention to.
Resfortes produces award-winning wines from the Côtes du Roussillon at the foothills of the Pyrenees, built on old vines, minimal intervention, and a deep sense of place. The range spans everything from the citrus-bright Rosé and expressive Chardonnay to the flagship old-vine Grenache of The Brave, giving you genuinely varied material to taste across body, acidity, and structure. Explore the full Resfortes wine range to start building your own tasting flight. You can also visit the sustainable vineyard pages to understand the terroir behind each bottle, which enriches every assessment you make. Free shipping applies on three bottles or more in the UK and France.
FAQ
What is the correct order for wine tasting?
Follow the sequence: look, swirl, smell, taste, evaluate. A fixed tasting order with a 50 to 60 ml pour in a tulip-shaped glass produces reliable, repeatable results.
How do I know if a wine has high acidity?
Focus on salivation after swallowing or spitting. Immediate salivation under the tongue and along the gums signals high acidity. Delayed or minimal response indicates medium or low acidity.
Is it acceptable to spit at a wine tasting?
Yes, and it is actively encouraged. Spitting maintains palate clarity across multiple pours and is standard practice at any formal or professional tasting.
How can I improve my wine tasting vocabulary?
Keep a structured tasting journal using consistent categories (appearance, nose, palate, structure, conclusion) and review past notes regularly. Practising weekly blind tastings accelerates vocabulary development significantly faster than passive drinking.
What is the WSET and is it worth doing?
The WSET (Wine and Spirit Education Trust) offers internationally recognised wine qualifications from Level 1 through to Level 4 Diploma, all built around systematic tasting methodology. It is worth pursuing if you want a structured, credible path to expertise.